Friday 20 July 2012

free app for android photo mania try it


free app for android (((( photo mania)))) try it


Description


Photo Mania is an android application made by Nourayn media group to make cool image effects.
This application is free to use .Also you will get monthly updates and effects.


App Screenshots


free app for android (((( photo mania)))) try it-unnamed-1-.jpg
free app for android (((( photo mania)))) try it-unnamed-2-.jpgfree app for android (((( photo mania)))) try it-unnamed.jpg 

free app for android (((( photo mania)))) try it-unnamed-3-.jpg 


Download from here 


Thursday 12 July 2012

PhotoMania on Facebook: 250 Photo effects for your photos


About

More than 250 Amazing Photo Effects for FREE: http://photomaniafx.com/?r=ab
Mission
Make the world a funnier place and let our users enjoy playing with their photos
Company Overview
Trionity
Description
With PhotoMania you will create amazing photo effects and change your photos into artistic sketches, funny cartoons, famous celebs, lovers frames, pop-art pictures, creative paintings, vintage photography and many more amusing photo effects!
General Information
PhotoMania is an image processing service providing state-of-the-art photo effects.
PhotoMania enables its users to turn their digital memories within photos into exciting visual art instantly, without the need of any technical knowledge.
CLICK HERE to go to app 
related interest: 
sample picture after editing:


Wednesday 4 July 2012

download Photo Mania 3.0 for android


Photo Mania 3.0

Photo Mania
Size: 3.74MB
Price: Free
Category: Utilities
Updated: 2012-06-24
Requirements: Android 1.5 or higher
Downloads: 1,807

Description: 

Photo Mania is an android application made by Nourayn media group to make cool image effects.
This application is free to use .Also you will get monthly updates and effects.
follow our facebook page

https://www.facebook.com/pages/Photo-Mania/383196095065528

Recent changes:
version 3.0 includes new features like :

- Facebook sharing.
- New effects pannel.
- More demo pictures.
- Supports more screen sizes.
- Bugs fixing.


version 2.0 includes new features like :

- Two effect categories gray scale effects and color effects.
- Some effects are random and others are select-able by name.
- Sharing now is enabled by lot of ways like Picassa , Mail , All share ...

Content rating: Low Maturity

Recent Changes:

version 3.0 includes new features like :

- Facebook sharing.
- New effects pannel.
- More demo pictures.
- Supports more screen sizes.
- Bugs fixing.


version 2.0 includes new features like :

- Two effect categories gray scale effects and color effects.
- Some effects are random and others are select-able by name.
- Sharing now is enabled by lot of ways like Picassa , Mail , All share ...

Tuesday 3 July 2012

PhotoMania on Facebook: Photo Effects for Your Pictures


PhotoMania

Summer is the best season to shoot photos. After these 3 moths you’ll have tons of pictures from your vacation, open air hangouts, BBQ parties that you might share with friends on your Facebook page. If you want to add an artistic look to your images, first of all, you should try PhotoMania, a Facebook fun photo editor with over 250 free photo effects.

Obviously, to use PhotoMania, you need to have a Facebook account. Then visit the Apps section and type “PhotoMania” in the search box. Facebook will trigger PhotoMania app for you.


As you launch the app, you see the PhotoMania start screen that offers several groups of photo effects: sketches, paintings, cartoons, fun, modifications and a few more. Each group contains dozens of effects.
Just click the type you want and choose a photo from your Facebook photo albums. The selected photo effect will be automatically applied to the image and you will be able to download the photo with the effect or share it on Facebook immediately.
To make it clearer, watch a video tutorial on how to add photo effects to Facebook photos with PhotoMania.


What I mostly liked about PhotoMania is the ability to add effects to your friends’ photos and the photos tagged with your name. This option lets you present your friends with awesome collages even if they do not use PhotoMania yet. This can be a good way to say “thank you”, “I love you” or “I miss you” to the nearest and dearest on Facebook. Besides, such cute collage can cheer up, be a great ecard, a Valentine Day card or a message to the best friends. It’s needless to say your friends will appreciate your attention.
Upon the whole, PhotoMania is simple, but probably, the most suitable photo app for Facebook you should know for sure. However, it has a few drawbacks. The app page is full of tricky ads that you may be a bit confused where to click next. And the photo editor asks for permission to post on your behalf on Facebook, though you can reject it and still use PhotoMania. So try PhotoMania right now.

Sunday 1 July 2012

Download Photomania Deluxe 6.73

 Photomania Deluxe Review: 

Photomania is an image enhancement program with a variety of effects

Photomania is a fun little Windows application for viewing, enhancing, editing, applying effects and sharin your images. Photomania Deluxe is fully-featured and can generate high-quality views of the most popular and most used image formats (like png, jpeg, gif, tiff, tga to name a few).

Some of the effects Photomania can apply to images are mostly inspired by AdobePhotoshop and include:

  • General image enhancements
  • Colorize
  • Rotate and Crop
  • Sepia effects (making your photos look old)
  • Black and White
  • Blur
  • Sharpen
  • Despeckle (remove noise)
  • Glass Stain
  • Pixelate (my favourite)
  • and more.


Cosmotek overall does a good job of combining some well-known, often used effects in this image viewing/image editing bundle.

The latest version (so, version 6.73 and above) are confirmed working on Windows 7, both on 32-bit and 64-bit machines, but the program installs in Program Files (x86) so it does run as a 32-bit application.


From COSMOTEK:

Photomania is a comprehensive application ideal for acquiring, organizing, viewing, enhancing, and sharing your images.

Photomania Deluxe 6.73 is licensed as Freeware for the Windows operating system / platform without restrictions. Photomania Deluxe is available to all software users as a free download (Freeware).

Filed Under:

  • Photomania
  • Photomania Download


Photomania Deluxe Abstract

To edit Photomania implementation, monitoring, and images to increase.

Photomania Deluxe Description

"To edit Photomania implementation, monitoring, and images to increase."
indir.biz Editor: Photomania achieve a comprehensive application ideal, editing, imaging, a development, and image sharing.


Full featured image viewer quickly generates high-quality images of pictures. 40 image file formats Photomania support & 50 effects (filters) on.


Image read support: PNG, BMP, ICO, EMF, WMF, JPEG, JPEG2000, MNG, TIFF, RAS, TGA, GIF, PCD, PSP, PCX, PSD, FAX, SGI, RGB, PNM, PGM, PPM, HIPS, BW, PDD, VST, ICB, VDA, RLA, RPF, CEL, PIC, PCC, SCR, EPS, CUT, IFF, RSB, LBM, ADA, XPM, SCR


Image type supported: PNG, JPEG, JPEG2000, MNG, TIFF, BMP, GIF, WMF, EMF, PCX, TGA, RAS, ADA, XPM


Basic effects: Antialias, Colorize, Field, Despeckle, Old articles (Sepia), Sharpen, Resize, Rotate.
can now Photomania Deluxe 6.73 download free.


DOWNLOAD PHOTOMANIA DELUXE 6.73


Saturday 30 June 2012

Editorial Review of Psykopaint


Just like there's a spectrum of art supplies from crayons to Connoisseur Kolinsky sable brushes, there's a spectrum of painting applications from Microsoft Paint to Photoshop and Corel Painter. Psykopaint is a Flash-based webapp that sits somewhere in the middle of that spectrum, neatly sandwiched between deviantArt muro on the draw-it-yourself side and Dynamic Auto-Painter on the algorithmic photo-to-painting side.
Psykopaint brushesPsykopaint offers an array of thirteen different brushes for free.
Like deviantArt muro, Psykopaint is a webapp. Unlike muro, however, it is entirely Flash-based. You can use it to create art from scratch, but its real mission is to help you convert photographs into paintings. Dynamic Auto-Painter does the same thing, and you only have to tweak a few sliders and set it loose on your photo. Psykopaint is a much more hands-on experience: You pick a brush and paint with it all over your photo, transforming it bit by bit. So it feels(a little bit) like you're painting , but really, Psykopaint is doing all of the heavy lifting for you--almost like working with a coloring book. I tried using Psykopaint with my Intuos5 pen tablet, but it actually worked better with my trackball: It is not pressure sensitive, nor did it respond to the angle in which I was holding the stylus. A desktop version of Psykopaint, not yet released at the time of this writing, promises to detect pen pressure.
Psykopaint screenshotAfter playing around with brushes and layers, you can end up with something that doesn't look much like a photograph at all.
Psykopaint also shares a business model with deviantArt muro: The basic application is free, but extra brushes and tools cost money. You start off with a set of 13 free brushes inspired by famous painters (with names like Manet and Renoir), but almost any other tool in the interface costs money. Want to use an eraser? That'll be five coins. Want to be able to add layers to your painting? Forty coins please. Coins are priced in bulk: 15 coins cost $2 (around $0.13 per coin), and 1,000 coins cost $80 ($0.08 per coin).You can also buy bundles of 50, 100, 200, or 400 coins. Brush packs cost between 10 to 35 coins, which means that 200 coins ($18) will get you very far. You can also get some coins, but not very many, for sharing PsykoPaint with friends. Once you buy a tool, it's yours to keep, not just for the current painting. While having to constantly shell out for new features feels a bit greedy at first, it actually lets you grow into Psykopaint and not become overwhelmed by a glut of tools. Most users will probably become very familiar with the tools they have and spend money on new tools only when they really need them.
Psykopaint brush purchase screenshotWhenever you purchase a new tool, an overjoyed cat congratulates you.
Layers are handy in Psykopaint. You can create a background layer and paint over it with a course brush, and then create another layer for the foreground and use a finer brush to make the main subject of your photo stand out. You could even use different brush styles, such as a wild impressionist brush for the background, and a more detailed spot brush (10 coins please) for the foreground. Painting fine details is tricky: When I drew over a photograph of a rider jumping with a horse, the harness and other fine details of riding tack were lost. Still, you could say that the same thing sometimes happens when you draw with real brushes.
While Psykopaint's brushes are beautifully detailed and highly customizable, its rendering engine doesn't come close to that of Corel Painter. With Painter, watercolors dry into the paper, and oil paint mixes convincingly. Then again, Psykopaint does not bill itself as a natural media application, but more as an inexpensive way for people to express themselves artistically without an extensive education or years of practice. And in that, Psykopaint does admirably well.

Note: The Download button takes you to the vendor's site, where you can download use the latest version of the software. Some brushes and other effects cost coins purchasable within the program. 

Thursday 21 June 2012

Top Photo Editing Tips


Digital camera in hand, you mingle with friends and family on the lawn for the last big summer BBQ. As you take a few pictures, though, they all approach you, one by one--and beg for copies.
Wait a minute. That wasn't part of the plan! Now you need to turn around and e-mail shots from this photo collection. And when you sit at your PC later and examine the images, you realize that they're not your best work. Some are crooked, others have Omen-esque red-eye. Others are dark and murky--guess the flash didn't fire.
Don't worry, though. Here are ten quick and easy ways to fix your photos and make them look so good you won't have any qualms when you click Send.

1. Stop Looking Sideways: Rotate the Picture

Cameras don't take square pictures; they take rectangular ones. To frame a scene that's taller than it is wide, you probably turned the camera on its side before you snapped the shutter release. That's great, but don't send those sideways pictures to your friends. Turn them right side up first.
You can rotate your sideways pictures in almost any image-editing program. In Paint Shop Pro, open the picture and choose Image, Rotate and turn it to the left or the right by an even 90 degrees. If you have Windows Me or Windows XP, it's even easier. Just double-click a picture to open it in the Windows Picture and Fax Viewer. Then click the Rotate Clockwise or Rotate Counterclockwisebuttons at the bottom of the screen.

2. Seasick? Straighten the Picture

In the rush to take a photo, we don't always get the camera perfectly level--and that adds up to photos in which the horizon is slightly askew, as if you had shot the pictures from a sailboat. Fear not. Crooked digital photos are nearly as easy to straighten as picture frames hanging on your wall. (And they're more likely to stay straight after you fix them, too.)
All you need is an image editor that lets you rotate pictures a degree at a time, and most programs have this feature hidden somewhere in the Edit or Image menus. Look for an option to rotate the picture and enter a very small value, like one degree to the left or right (depending upon which way you need to adjust the photo).
In Paint Shop Pro, click Image, Rotate and check the radio button beside Free. Then enter your small value. If that doesn't fix the problem, undo your edit (choose Edit, Undo) and try again with a different number. You can rotate your photo by fractions of a degree, like 0.7 or 1.4 or 2.5. When you experiment, always undo your last rotation and try again from the original version; if you pile rotations on top of rotations, you can create noticeable "glitches" or blurriness in your photo.

3. Crop Away the Background

In your mind's eye, the picture may have been a shot of your nephew's birthday cake. But now that you see it on your PC, you realize that you didn't zoom in very far--so you've taken a picture of half the room as well. Use your image editor's cropping tool to cut away the unwanted part of the picture and isolate just the meat of the scene.
In most image editors, the cropping tool lives in the tool palette and looks like a picture frame. Click the cropping icon and, as you hold your cursor down at a starting point, use the tool to draw a rectangle inside the picture. Arrange the crop mark to re-compose your photo and discard the unwanted background. To do this in Paint Shop Pro, draw your rectangle, then click the Crop Imagebutton in the Tool Option box that floats around on the screen.

4. Shine Some Light in the Darkness

Is your photo too dark? A slight underexposure can ruin an otherwise great photo, so punch up the brightness a bit to give it some life. Try your image editor's gamma control--a tool that's designed to brighten the darkest parts of the picture without "overexposing" the parts that are already bright. If your image editor offers gamma control, you'll usually find the feature in menus like Colors or Image. Some programs, such as Microsoft Photo Editor, let you access the tool (Image Balance) from the toolbar.
In Paint Shop Pro, choose Colors, Adjust, Gamma Correction. You can raise the gamma as high as 1.3 or 1.4 in many pictures before the scene gets too washed out. But whatever level you choose, be sure to keep an eye on the evolving picture as you experiment with each setting.

5. Zap the Red-Eye

Using your camera's flash can sometimes cause the dreaded red-eye effect. If your photos look like they're filled with demonic partygoers, you can zap the red-eye out of your shots automatically in many image editors. In Paint Shop Pro, choose Effects, Enhance Photo, Red-Eye Removal, then zoom in on the red eyes and create a circle of color directly over the red spot.
If you have a basic image editor, like Irfan Skiljan's IrfanView or Microsoft Paint, that doesn't have an auto-correction tool, just zoom in on the eyes and paint over the red with a natural-looking shade of black or blue.
Remember that you don't have to be Picasso to eliminate red-eye convincingly. When you zoom back out, the eyes will be small enough that your brushwork should look more than adequate. The important thing is to paint over the red.


Thursday 24 May 2012

thing you didn't know your dslr could do


As with learning any topic, students usually learn a tremendous amount of information about a topic for the first while, then they reach a certain level of competency and halt all learning.  The same is true with photographers when we get a new camera.  When we first get our hands on a camera, we spend every waking second learning how to use it and all the buttons and dials.  Then… we suddenly stop. But if you stop learning your camera too soon, you miss out on some REALLY COOL features in most–but not all–DSLR cameras.
This post will hopefully enlighten you on a few features that are commonly (but not always) put in DSLR cameras that most photographers don’t know they have.
Oh, and my favorite thing about writing this post is that I just CAN’T WAIT to read the comments.  There are always a few “know it alls” who have to share with me the fact that they “knew that stuff already.”  I get a lot of pleasure out of those comments for some reason… but I hope everyone finds at least one thing in this list that is new.

Custom picture contoler 
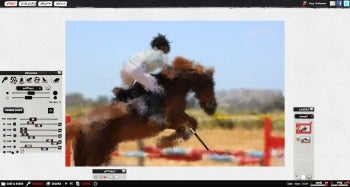
First, some background.  Picture Controls (that’s Nikon’s name for it) or Picture Styles (for the Canonistas) are applied to every picture you take.  The RAW photo coming off the sensor lacks contrast, sharpness, and color saturation.  In fact, it’s downright ugly.  Your camera applies these adjustments to each picture to pretty it up for you. I have never worried myself with setting the Picture Control because I ALWAYS shoot in RAW.
However, I was out shooting with Dustin Olsen a few months back and looked at the back of his camera to see how the photos were coming out.  WOW!  It was so much more beautiful than my LCD screen!  Dustin sets a custom picture control so that the photos on the LCD screen look more like how they will look in post-processing.  This helps him to visualize the finished photo.  Changing the picture control if you shoot in RAW will not affect the image you see on the computer, but it will help you see what you’re capturing on the camera. To set a custom picture control or picture style, go to your menu and find the custom picture control setting.  I like to use these settings:   If you shoot in RAW instead of JPEG, this is still true because your camera saves out a JPEG preview that is used as the thumbnail image and to display on the LCD screen on the back of your camera.
 Multiple exposure
 Multiple exposure can be pretty fun for creative effects, and it is an oft-overlooked feature on many DSLRs (not all of them have this).  Multiple exposure means the camera takes 2 or 3 (or more) photos in a row and then combines them to create one picture. For example, you might shoot a runner sprinting down the track.  For a creative effect, you could set your camera to multiple exposure and lock it down on a tripod.  Then take three pictures of the runner sprinting by and the camera will combine them into an action sequence. 

 Time lapse
Sorry Canon shooters, your DSLR most likely won’t have this feature; however, most Nikon cameras come with this feature.  A time lapse is when your camera is set to take a picture every second or so.  Then, the individual frames (usually taken over the course of 30 minutes or more) are combined to create a video like this one. On a Nikon DSLR, you can find this feature on the menu called “Interval timer shooting.”  I wrote out a tutorial here of how to do timelapse on both Nikon and Canon cameras. 

 Time bofore sleep

Nothing is more annoying when shooting than when the screen constantly turns off while you’re reviewing images on the LCD screen.  I like to take a nice long look at the photos and zoom in on different parts.  I like to work methodically most of the time, and especially when shooting landscapes.
All DSLRs allow the photographer to adjust how long a photo is displayed before the screen goes to sleep.  I like to set this to about 10 seconds.  If you are short on battery life, this probably isn’t a great idea, but I always have fresh batteries lying around and use a battery grip, so I don’t really worry about battery life nearly as much as I worry about being able to get a good long look at the photos I’m working with.
Lately, I’ve been experimenting in working with an iPad so when I shoot a photo, it shows up almost immediately on my iPad (wirelessly) so I can see the photos full screen.  I love it for landscapes where I’m working slowly and really checking each picture, but it’s probably impractical for shooting portraits, sports, wildlife, or other fast-moving subjects.

No, not exposure compensation.  Exposure compensation is when the photographer tells the camera to decide the correct exposure, and then get either brighter or darker depending on what exposure compensation setting the photographer set the camera to.
Flash compensation works similarly.  The camera will determine how much flash output is needed, and then the photographer can set the camera to either give more or less power to the flash according to the look that the photographer is attempting to achieve.
When might you use such a thing?  I thought you’d ask.  If you’re using an all-manual flash like the YN-560 (see my YN-560 review here), then this is entirely irrelevant.  This is also mostly irrelevant if you are using an eTTL or iTTL flash because those flashes allow the photographer to change the flash compensation from the flash’s menu so you don’t have to go through the camera menu.
The use-case for this is when you’re in a pinch and are forced to use that blasted pop-up flash.  Photographers hate using the pop-up flash because it looks ridiculously ugly since the light is coming from the same angle as the camera and therefore not directional.  However, if you use flash compensation, you can control how much flash is used and achieve much better pictures when you’re in a pinch and you need to use flash (like when Aunt Janet hands you her point-and-shoot to take a picture at the wedding).

This feature is somewhat better known among photographers, but still the kind of thing that a lot of photographers don’t notice until they have shot for years.  Most DSLR cameras have a small black button on the front of the camera just to the left (camera left) of the lens.  If you look through the viewfinder and press the button, it will make the screen go a bit darker, but it will also show you how the depth-of-field will look when you take the picture.
The button is useful because, contrary to popular belief, changing the aperture setting on your camera does not immediately adjust the aperture in the lens.  The aperture snaps into place only right before the picture is taken.  This is done so the camera can gather as much light as possible for focusing before the picture is taken.  So when you’re looking through the viewfinder, you already know what the depth of field will look like.  Don’t worry about the fact that the viewfinder will be darker–this is just because the closed aperture reduces the amount of light going through.

Newer model Canon and Nikon DSLR cameras have begun to include “Instagram mode,” but it currently requires two tablespoons of butter to activate.  All you have to do is smear the butter over the front element of your lens and viola!  You have that “beautiful” look that only Instagram can offer.
Sorry for those of you who aren’t geeky and don’t understand nerd humor.  Instagram is an iPhone (and Android) app for photography that puts some really overdone effects on photos so everyone can call themselves artists (okay, fine… it’s fun).

I get SOOO MANY questions about back button focus that I decided this one deserves its own post.  Learn about back button focusing here.
Using back button focusing can help get your focus more precise and faster.